 English
- English
-
 Español
 -
 Português
 -
 русский
 -
 Français
 -
 日本語
日本語 -
 Deutsch
 -
 tiếng Việt
 -
 Italiano
 -
 Nederlands
 -
 ภาษาไทย
 -
 Polski
 -
 한국어
한국어 -
 Svenska
 -
 magyar
 -
 Malay
Malay -
 বাংলা ভাষার
 -
 Dansk
Dansk -
 Suomi
Suomi -
 हिन्दी
 -
 Pilipino
 -
 Türkçe
 -
 Gaeilge
 -
 العربية
 -
 Indonesia
 -
 Norsk
Norsk -
 تمل
تمل -
 český
český -
 ελληνικά
 -
 український
 -
 Javanese
 -
 فارسی
فارسی -
 தமிழ்
தமிழ் -
 తెలుగు
 -
 नेपाली
 -
 Burmese
 -
 български
 -
 ລາວ
ລາວ -
 Latine
 -
 Қазақша
 -
 Euskal
 -
 Azərbaycan
 -
 Slovenský jazyk
 -
 Македонски
 -
 Lietuvos
 -
 Eesti Keel
 -
 Română
 -
 Slovenski


Analysis of the causes of damage to printed circuit boards
2023-12-26
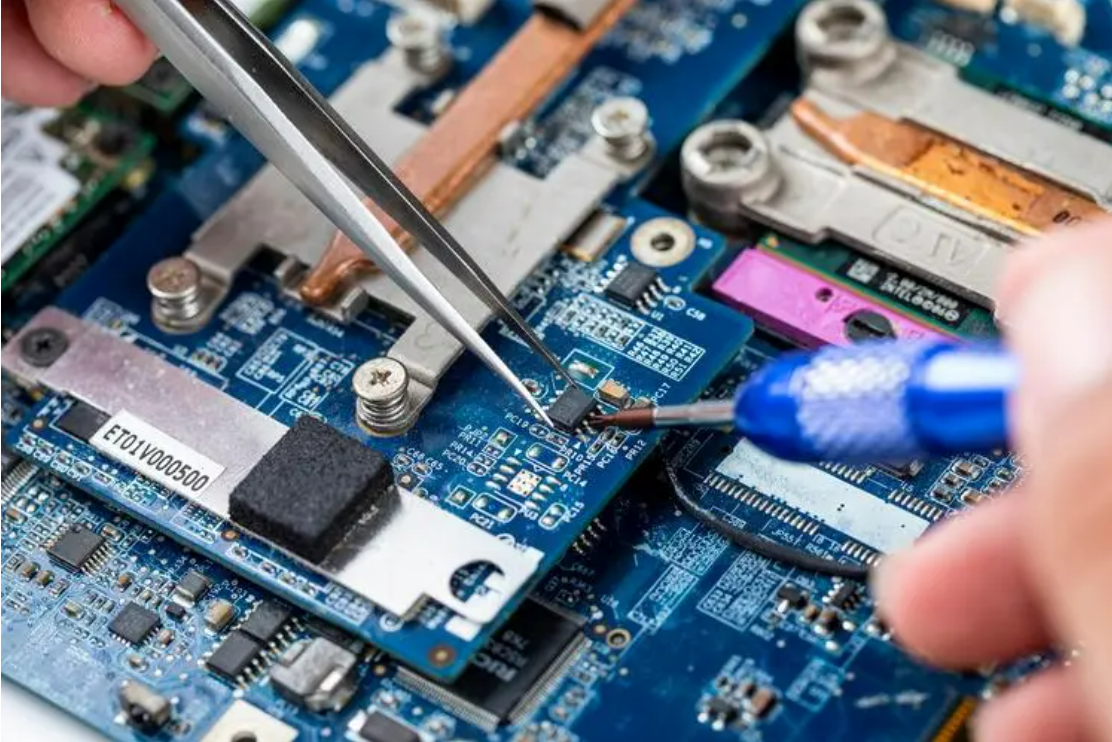
Printed circuit boards can experience a variety of problems as they are used for longer periods of time. From damaged alignments that affect the conductivity of boards and circuits to component failures where capacitors or diodes are about to disappear, there are many points of contention on circuit boards. It helps us to identify and understand some of the most common faults so that the problem can be dealt with in a relevant manner. The main points are as follows:
1. Physical Damage
Virtually all of the most common causes of PCB damage come from physical damage to the device or its internals. This may be related to physical pressure or vibration. It is possible that it has been struck or forced by another object; it is also possible that the device has been disassembled for any reason and damage has been caused directly to the circuit board.
How to diagnose and repair
As long as the situation is not a total failure (the board falls to the ground and breaks or cracks completely), the physical damage can be remedied through the remanufacturing process. Usually, this involves melting down the damaged portion of the board or repairing it through disassembly and reassembly. Due to the nature of most physical damage, it is highly unlikely that someone without experience in printed circuit board repair would be able to accomplish this as a DIY project. Physical damage can only be repaired by trained and experienced professionals. In most cases, it requires board reshaping, re-soldering of components and re-grouping of conductive traces.
2. Component failure
In addition to damage to printed parts, faulty components are the most common cause of printed circuit board failure. In fact, if there is no physical damage, but the device won't run or won't power up, it's almost guaranteed to be related to one of the components connected to the motherboard.
The component itself can be anything from a capacitor to a diode or microprocessor. If the component is the problem and is dead or not working, it may need to be replaced altogether. However, the problem is not always the actual component. Sometimes due to aging, overheating and voltage dips, tracking circuits can deteriorate to the point where they no longer conduct electricity. One or more of the components may also have been completely removed from the board and need to be relocated.
How to Diagnose and Repair
You may ask how to fix a printed circuit board when a component fails. Again, the process of repairing and remanufacturing faulty components is best left to the professionals. Voltage tools and various devices are available to test the conductivity of circuit boards. They can also be used to identify if there is current flowing to a component or if a component on the board has failed completely. Many times, you can see components that have failed simply by opening the unit. Their housings may appear to be burned, cracked or broken, or the component may have been completely removed from the board and come loose.
To repair a faulty component, you may need to apply heat (usually with a heat gun) for soldering and perform rigorous testing.
3. Damage to the alignment
The alignments on a circuit board are conductive paths made of silver or copper. Often, you can see problems with the traces with the naked eye, but not always. If an alignment suffers damage, either through regular use or physical damage, it can have a significant impact on the conductivity of the printed circuit board, its components and associated equipment.
Some of the more common causes of trace damage include lightning strikes, severe power surges or short circuits, metal dust contamination, overheating and normal wear and tear.
How to Diagnose and Repair
If the alignment is not very thin and difficult to see, damage can usually be recognized by scanning the path. Copper and silver are by nature bright and shiny, which makes it easier to recognize when they are broken or damaged. Keep in mind that this is not always the case, but it is certainly an option.
To repair a faulty or damaged alignment path, you simply need to re-solder or re-pressurize the board using the necessary materials. This will reconnect disconnected circuits and allow current to flow freely throughout the board.
4. Poor Design
As much as we'd like to praise every engineer or product developer in existence, it's just not feasible. Sometimes, for whatever reason, teams may cut corners when designing a circuit board or manufacturing necessary components. This can lead to poorly designed and constructed circuit boards that can create problems down the road.
Unfortunately, poor design of printed circuit boards can lead to many things, and many of the failures that occur have been discussed here.
How to Diagnose and Repair
As soon as a circuit board fails or is not working properly, you will know immediately because even after a repair or service session, the device will still fail again and again. The best solution for a poorly designed board is to replace the board completely by visiting an official or authorized repair center.
The easiest way to recognize a poorly designed board is the number of malfunctions or problems that occur after prolonged use. Unless there is significant physical or electrical damage to the device, if you have repaired or analyzed the board somewhere and there are a lot of problems, there may be a problem with the board's construction. In some cases, this simply means that the original manufacturer used cheap or unreliable components, but the motherboard itself is fine.
5. Power Failure
In most cases, a power supply failure is very similar to a component failure, and may even be the same failure. The ultimate problem stems from a major power failure on the whole or part of the board. One of the components may have been exposed to a higher than normal voltage, causing it to overheat and explode. Perhaps a trace failure caused a short somewhere? In either case, a power meter can be used to test each individual component and the overall conductivity of the board.
How to diagnose and repair
All professional repair teams have a power meter or voltmeter that can be used to identify electrical problems with the board and its components. In fact, this is the only way to diagnose problems beyond visible damage to components. As far as repairs go, the process is best left to the professionals, but usually involves relocating or replacing components.
Previous:Why are many PCBs green in color?


X
We use cookies to offer you a better browsing experience, analyze site traffic and personalize content. By using this site, you agree to our use of cookies.
Privacy Policy